AUSTRIAN PLANS:
Given the "big" Prussian victory at Plotistie, the Austrians made some major changes to their army composition and leadership roles:
Prince Charles transferred from his army (the one that lost at Plotistie...which was now under command of Daun) and rode to Prague to take over Browne's command. Prince Charles brought with him 6 infantry regiments and 4 Kurassier regts.... that were recovering from the drubbing they received at Plotistie.
Daun marched his remaining forces to Pardubitz and started building extensive fortifications in the form of redoubts between the town, woods , and river. A very strong defensive position....indeed! This position was south of Koniggratz on the main road to Prague. From this position he could protect both Koniggratz and Prague...with only a few days march from each. And he could operate on the flank or rear of any Prussian move on either of the 2 cities.
Daun's command included the following:
10 infantry regts (20 battalions) 1,680 figures (16,800 men)
4 Grenz regts (8 battalions) 800 figures (8,000 men)
editors note: Well I guess we now know "where" the missing 4 Grenz regts. are!
3 Dragoon and 2 Hussar regts. 320 figures (3,200 men)
24 12lb gun models (48 actual 12lb guns) (96 artillery men)
Totals: 2896 figures (28,960 "men")
Daun had placed the Grenz in both woods that flanked his position and placed a entire Grenz regiment in the town. He hoped that this would prevent any enemy flanking movement. And make it a "frontal" battle against his redoubts.
PRUSSIAN PLANS:
After congratulating Keith on his victory at Plotistie, Frederick ordered Keith to take the bulk of the cavalry and 6 infantry regiments and march as fast as possible to join Frederick in investing Prague.
The remainder of his Plotistie command was sent to join Bevern's command and attack Daun.
Bevern's combined command now included the following:
9 infantry regts (18 bns), combined grenadier brigade (4 bns) = 1590 figures (15900 men)
2 Dragoon regts and 2 hussar regts 400 figures (4,000 men)
20 12lb gun models (40 actual 12lb guns) 80 artillery men
Totals 2070 figures (20,700 "men")
Bevern was outnumbered almost 3 to 2, but still decided to attack! He reconnoitered the Austrian position and decided that the "cramp" space worked in his favor...preventing the Austrians from overwhelming his flanks! Also, this chronicler must state that Frederick had seen fit to assign the following senior generals to "assist" Bevern.....
Field Marshall Schwerin, L.G von Winterfeldt,
and LG Manteuffel. I do not know why Frederick assigned such famous generals to Bevern, ...perhaps to add "additional control, inspiration and "direction". Bevern left nothing in his memoirs as to "how he felt" about the assignments. However it must be pointed out that Bevern assigned each of these "elite" generals to the must critical and dangerous points of the battle....with both "good and tragic" results!
The following is the AAR of the Battle of Pardubitz:
A Tale of Gallantry and Tragedy:
The following is the initial deployment of each army:
Overall view of Austrian deployment.
Austrian right flank, with Grenz in woods and village.
Cavalry reserve in the rear.
Austrian left flank and center with 2 large redoubts.
Austrian center and right flank bordered on woods and small village.
Austrian far right flanks and rear cavalry support.
Austrian far left flank with woods and town occupied by 2 Grenz regiments.
Overview of entire Prussian deployment.
Prussian left flank attack. Led by Schwerin and von Winterfeldt.
Prussian attack in the center against the "great redoubt"
.
Prussian right flank attack.
Overview of Prussian left flank attack forces.
Prussians move off to the attack, Austrians reply with "heavy fire".
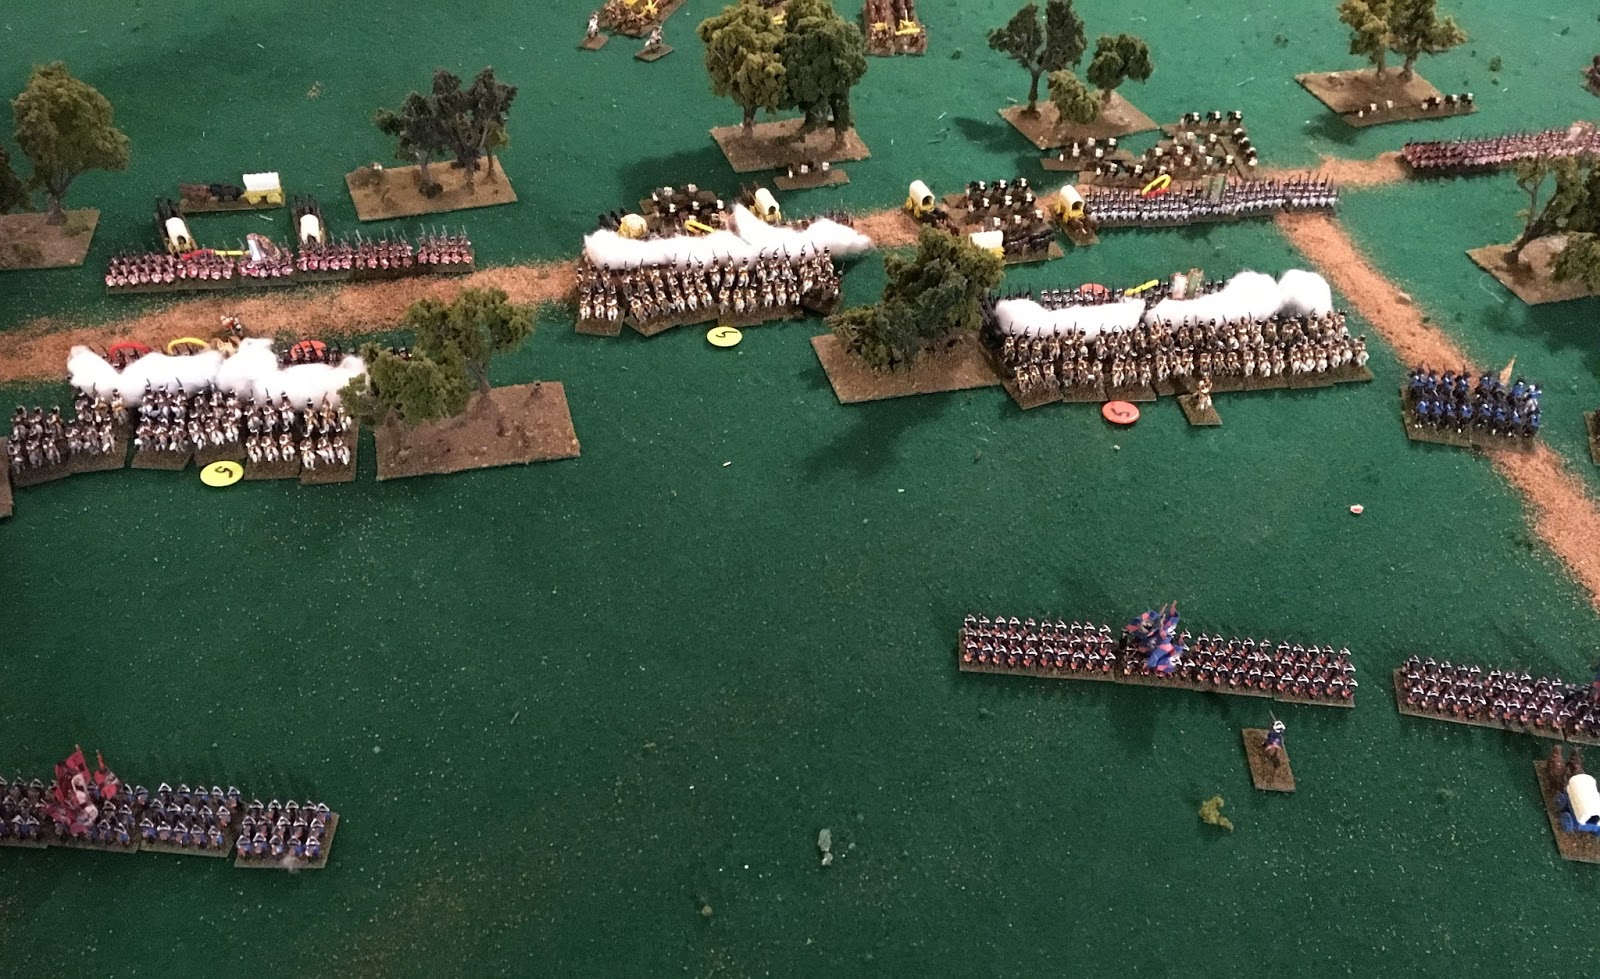
Austrian right flank is under attack. Prussians move up to assault redoubts.

This is Schwerin's and von Winterfeldt's commands. Notice 5th Hussars (Deathheads) maneuvering to protect flanks of attacking infantry
Overview of Prussian attack on Austrian flank. It appears that the choice of Schwerin to lead this attack was "wise".
The Prussian attack on the Austrian center was led by Manteuffel and Bevern.
Prussian "view" of attack on the woods by Munchow Fusiliers.
How does line infantry dislodge Grenz in the woods?? With a bayonet attack....I hope!
A "shot" of the Austrian view of the center attack, That sure is a lot of Austrian infantry in reserve!!
Austrian defense of their right flank. Infantry move to support redoubts!
Panoramic view of Prussian left flank attack.
Prussian infantry have closed with Austrian artillery in redoubt.
Munchow Fusiliers close with Grenz in woods.
Close-up between Fusiliers and Grenz.........W.T.H. (what the hell!)
"" OMG" von Winterfeldt is hit by 3 Grenz musket balls and dies instantly!
SO how is Bevern to tell "FREDERICK"!!
Another close-up of Prussian attack....and von Winterfeldt's death.
Prussian center continues to attack Austrian center and right flank.
Austrian artillery is devastating Prussian infantry.
Austrian gunners are "destroyed" in the right flank redoubt and rout from the field! Why didn't Austrian infantry in reserve .."rush in to support them?" A lot of good they do standing around in the rear. Now they may be "swept up" in the subsequent rout!!
Austrian artillery have routed thru the supporting infantry and swept them along in the rout. Yellow rubber bands denote rout, "red" means retire 2 turns. The whole Austrian right flank may ....run!
The victorious Prussian left flank attack...Victory is near!
But wait Munchow Fusiliers "see" von Winterfeldt's "limp" body being carried from the field and begin "rapid" retreat (actually rout...but we don't talk about such things in the Prussian Army)
Prussian continue attack on Austrian main redoubt in the center....taking over 1,000 causalities in the process.

Austrian entire right flank is beginning to crumble!
Even their reserve cavalry have rolled "retire". Of course these were the same "fellows" that routed from the field at "Plotistie". A chance for redemption..failed!
Austrians attempt to solidify right flank by getting in a fire fight with Prussians. But wavering troops, in retreat seldom unleash a "heavy fire"!
Munchow Fusiliers have successfully conveyed von Winterfeldt's body from the field and are "done" for the day. However, the Forcade Fusiliers have replaced them in trying to clear the woods of Grenz.
Fresh Prussian infantry begin a "fresh" assault on the main redoubt.
Austrian view of Prussian attack on the center. Why doesn't Austrian infantry counter attack? Perhaps because Prussian "grand battery" begins to "rake" their ranks!
Picture of Austrian "reserves" in the center.
"Things" continue to deteriorate on Austrian right. Their infantry looses the fire-fight.
Austrian right flank...the entire right flank begins to rout...or more correct... continues to rout!
But unfortunately Field Marshal Schwerin is killed in the fire fight. There is no command figure to take his place and the Prussians....fail to advance. Bevern is not immediately informed ...because he is engrossed in leading attacks on the Austrian center. And no one can find him. Not a very good "command trait" for C-in-C!
Another view of Austrian right flank collapse!
Finally Austrian infantry move up to support redoubts.
Prussians continue assault on redoubts. They lose 2,000+ men in this assault.
Overview of battlefield.
Prussian infantry finally close with redoubt! Prussian 6th Hussars move up to support infantry and "defy" Austrians to countercharge!
You can clearly see Austrian right flank is in full retreat.
But with Field Marshall Schwerin's death there is no one to order the exhausted Prussians to advance,
Did Frederick's command assignment assure a victory, but keep it from being a "total victory"??
Austrian reserve cavalry move up! The redoubt has fallen, but Prussians do not move forward....they are too busy slaughtering the Austrian gunners that killed so many of them!
Austrian main body starts to retire from the field....in good order!
Close up Austrians infantry retiring from field.
Final shot of Austrians army retiring from field. They were able to
recover only 8 of their 24 total guns...not good!
Pardubitz is yet another Prussian victory. And another Austrian army is retreating...but this time in good order. But the cost to the Prussians is bitter....3 of their best Generals are dead:
L.G .Manteuffel killed by cannonade, L.G. von Winterfeldt killed by musketry leading attack on woods, occupied by Grenz, and Field Marshall Schwerin in a firefight with Austrian infantry.
I am glad that I don't have to write those dispatches to Frederick!
The Butcher Bill is:
Austrian infantry: 393 figures (3930 men)
cavalry: 24 figures (240 men)
artillery 20 guns and crew lost 80 figures(800 men)
No generals lost
Totals = 497 figures lost (4970 men) 18 %
Prussian infantry: 280 figures (2800 men)
cavalry: no losses
artillery no losses
3 generals lost
Totals = 280 figures lost (2800 men) 13.5 %
But what will Frederick say about the dead generals!!!