There were two Prussian forces in the general area. The King's army was positioned north of Kolin and Bevern's army north of Nachod. Given the terrain it would have been very difficult for the 2 armies to unite before invading Bohemia. Frederick decided to march divided and concentrate outside the Austrian fortress of Koniggratz. This would allow the King and Bevern to receive supplies from secure lines while protecting the interiors of the homeland and Silesia. By advancing on Koniggratz Frederick expected that the Austrians would be forced to attack! Allowing Frederick to fight on ground of his choosing!
The combined army consisted of the following:
King's Army: Frederick: 20 Infantry regts., 12 Grenadier bns., 8 Kur., regts, 5 Dr. regts, 4 Hu. regts, & 30 12lb gun models. Totals = 3,870 infantry figures, 1,680 cavalry figures and 30 12lbers/ artillerymen=120,
Totals =5,670 figures ( 56,700 "real men"). Stationed southeast of Dresden near Bohemian border passes that lead to Prague.
Silesian Corps: G.L. Bevern: 8 Infantry regts.,4 Grenadier bns., 2 Kur., regts, 2 Dr. regts, 1 Hu. regts, & 8 12lb gun models. Totals =1,240 infantry figures, 480 cavalry figures and 8 12lbers/ artillerymen=32, Totals= 1,792 figures ( 17,920 "real men"). Stationed in Silesia between Schweidnitz and Neisse.
Totals:
28 Infantry regts., 16 Grenadier bns., 10 kur. regts., 7 Dr. regts., 5 hus. regts. 38 12lb. gun models. Totals = 4,200 infantry figures, 2,200 cavalry figures, and 38 12lb guns/ artillerymen =152
Total= 6552 figures (65,520 real men)
So why not attack Prague as Frederick had attempted in 1756? Frederick has come to realize that conquering territory, even key areas, will not win this war....only the destruction of Austrian Armies can save him from eventually being overwhelmed by the numbers.
The large number of cavalry (1/3 the total force) was because Frederick wished to screen his force and hinder the Austrians from reconnoitering his movements.
The Austrian forces in this theater were divided into 3 parts and consisted of the following OOBs.
Prince Charles' Command near Prague:
42 infantry bns, 21 Grenadier cos, 4 Grenz regts. , 12 Kur. regts, 8 Dr. regts, 6 Hus. regts. and 16 12lb gun models. Totals= 4328 infantry figures, 2080 cavalry figures, 16 12lb gun models/ 64 artillerymen
Total = 6472 figures (64,720 real men)
Serbelleni Corps Near Koniggratz:
14 infantry bns, 7 Grenadier cos, 2 Grenz regts. , 2 Kur. regts, 2 Dr. regts, 2 Hus. regts. and 8 12lb gun models. Totals= 1576 infantry figures, 480 cavalry figures, 8 12lb gun models/ 32 artillerymen
Total = 2080 figures (20,800 real men)
Königsegg-Rothenfels Corps Near Nachod:
12 infantry bns, 6 Grenadier cos, 2 Grenz regts. , 1 Kur. regts,1 Dr. regts,1 Hus. regts. and 8 12lb gun models. Totals= 1480 infantry figures, 240 cavalry figures, 8 12lb gun models/ 32 artillerymen
Total =1752 figures 17,520 real men)
Total= 10,304 figures (103040 real men) NOTE: This is 3752 figures more than the Prussian invasion force! But the Austrians are spread out the width of Bohemia from Prague in the west to the border with Silesia. And with the Prussians potentially massed in the middle across the Austrian lines of communication, supply, and coordination.
Next: The Battle of Nachod, Bohemia!
In defense of Nachod, Königsegg had picked a strong defensive position between the Metuje River on his left flank and the high ground on his right. He also had constructed 4 redoubts across his front... the Prussians can not "turn" this position and will have to assault it frontally. Another problem for the Prussians was that the Metuje flowed around Nachod and formed a barrier to the rear of the Prussians....in other words they would be assaulting the Austrians while having a river to their back! Given these problems then why did the Prussians attack? Bevern's aggression and willingness to risk his command had been demonstrated several times in 1756. Perhaps the King "needed" someone to press hard in spite of risks and causalities...or perhaps he saw a little of himself in Bevern. We will never know.
Austrian OOB:
12 infantry bns, 6 Grenadier cos, 2 Grenz regts. , 1 Kur. regts,1 Dr. regts,1 Hus. regts. and 8 12lb gun models. Totals= 1480 infantry figures, 240 cavalry figures, 8 12lb gun models/ 32 artillerymen
Total =1752 figures 17,520 real men)
Prussian OOB:
8 Infantry regts.,4 Grenadier bns., 2 Kur., regts, 2 Dr. regts, 1 Hu. regts, & 8 12lb gun models. Totals =1,440 infantry figures, 480 cavalry figures and 8 12lbers/ artillerymen=32, Totals= 1,952 figures ( 19,520 "real men").
The battle is on!
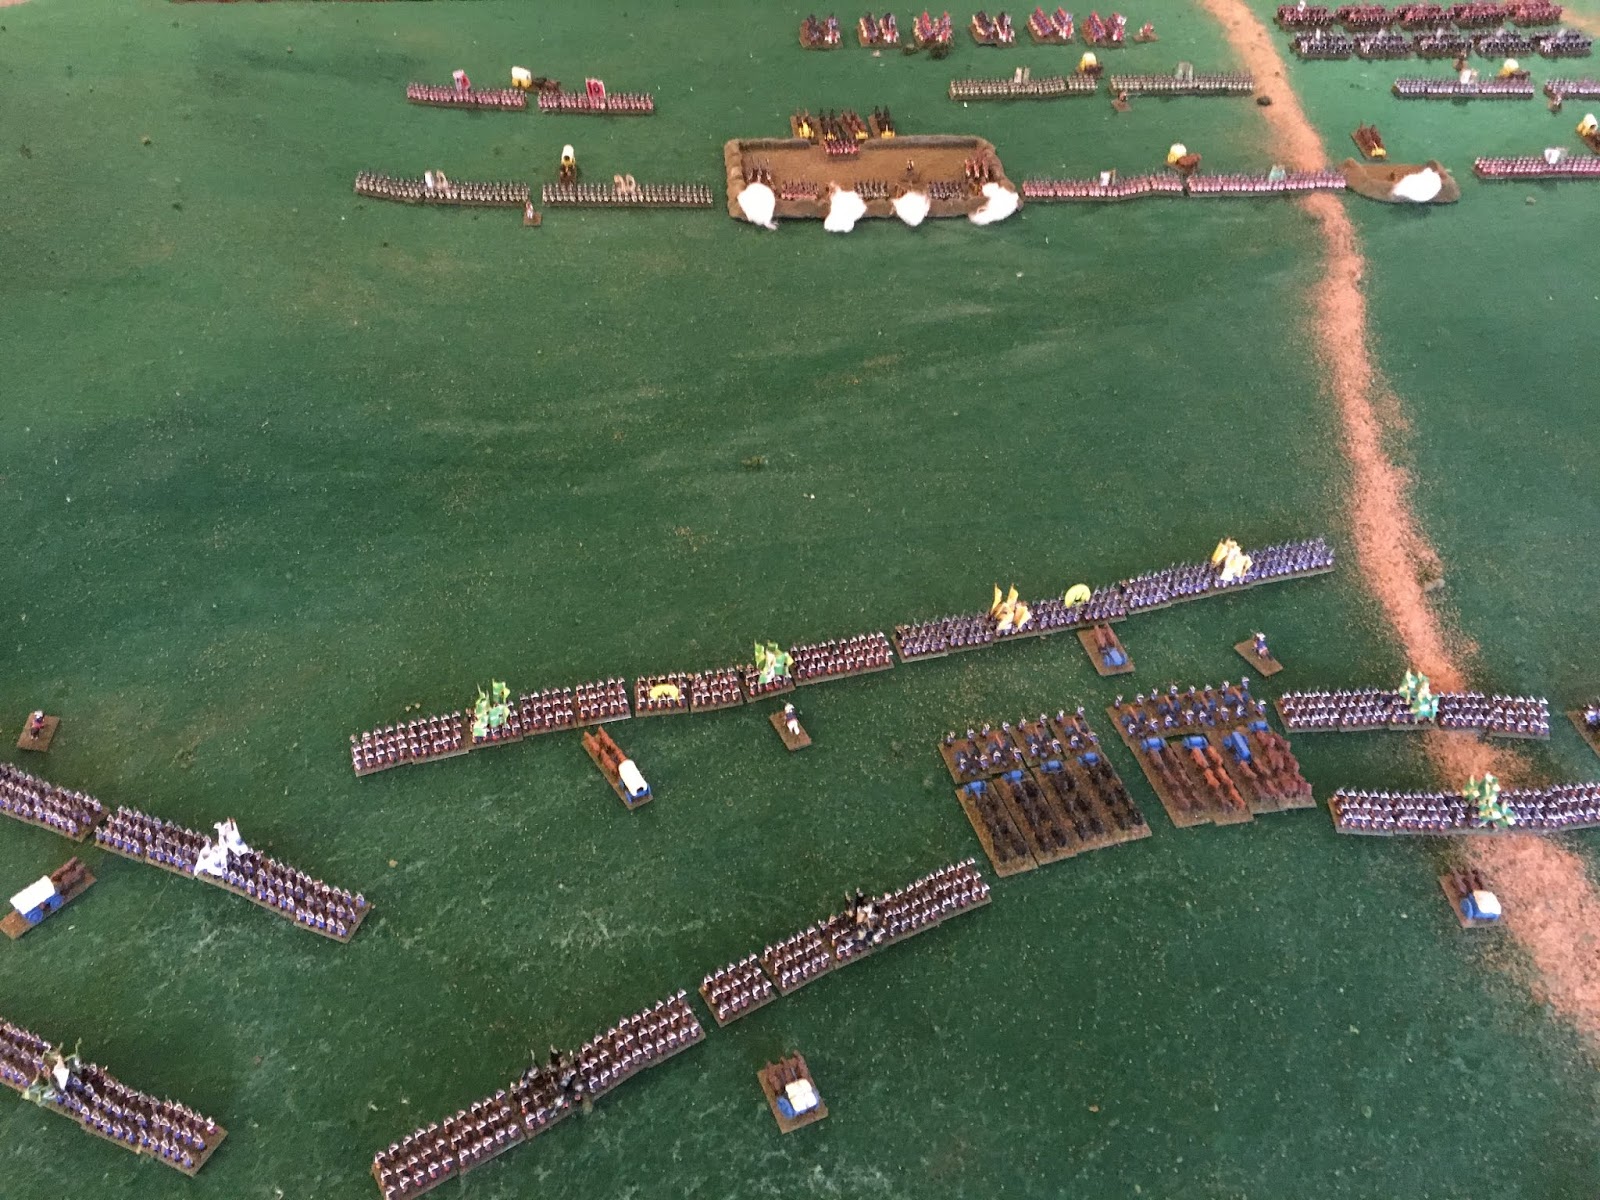
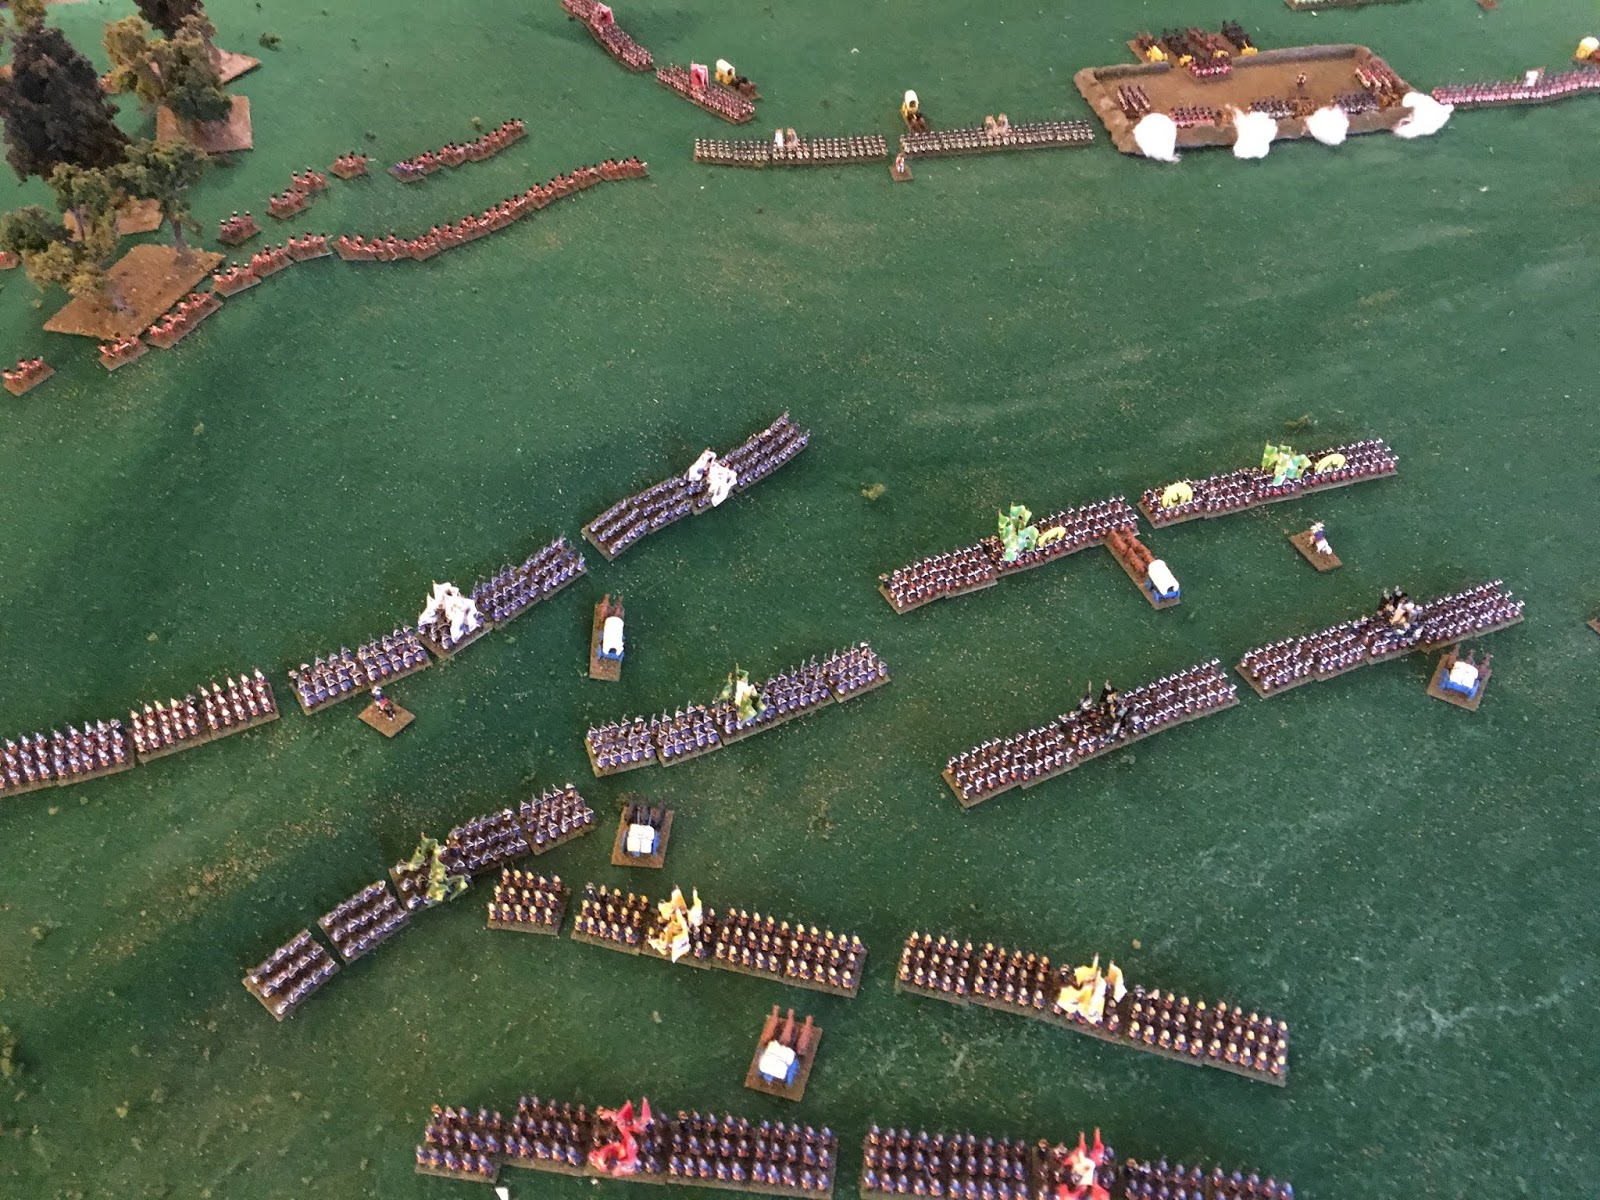
The first pictures are of the initial deployment of both armies:
The Prussian far left flank....4 crack Grenadier battalions assaulting the Austrian Grenz.

Next to the Prussian Grenadiers are 4 infantry regiments also marching against the Austrian far right flank.

Next we have the Prussian center with 4 more infantry regiments and all their artillery!

And finally we have the Prussian right with 2 Kurassier regts, 2 Dragon regts.

and a Hussar regt.
the Wartenberg "3rd Hussars"

Next we look at the Austrian original deployment. First on the Austrian left flank we find Grenz deployed in skirmish in the woods and 2 redoubts.

In the Austrian center we find 2 more redoubts (1 very big one), 4 infantry regts., 1 Kurassier regt., 1 Dragoon regt., the crack Austrian Grenadier companies and the rest of their artillery. This is the strong point in their line.

Next is another shot of the Austrian center.

The rest of the Austrian cavalry, a Hussar regt. is initially deployed on their right flank.

Note! That Prussian Grenadier battalions are positioned on the far left of the Prussian command in a position that allows them to advance up the hill where it is the "least" steep.

Another shot of the grenadier's "angle of approach", which means that they move at a rate of 2 for 3 as opposed to half speed for difficult terrain. This oversight by the Austrians was a serious flaw in their battle plan!

This next view is from the Austrian right flank...which shows that the Prussians "will be able" to assault the high ground. There was considerable discussion about this "ability" but in the end they came to the conclusion that perhaps they should have spent more time looking at all the possibilities and not settling on "assumptions"!

The next is a "bird's eye" view of the Prussian assault.

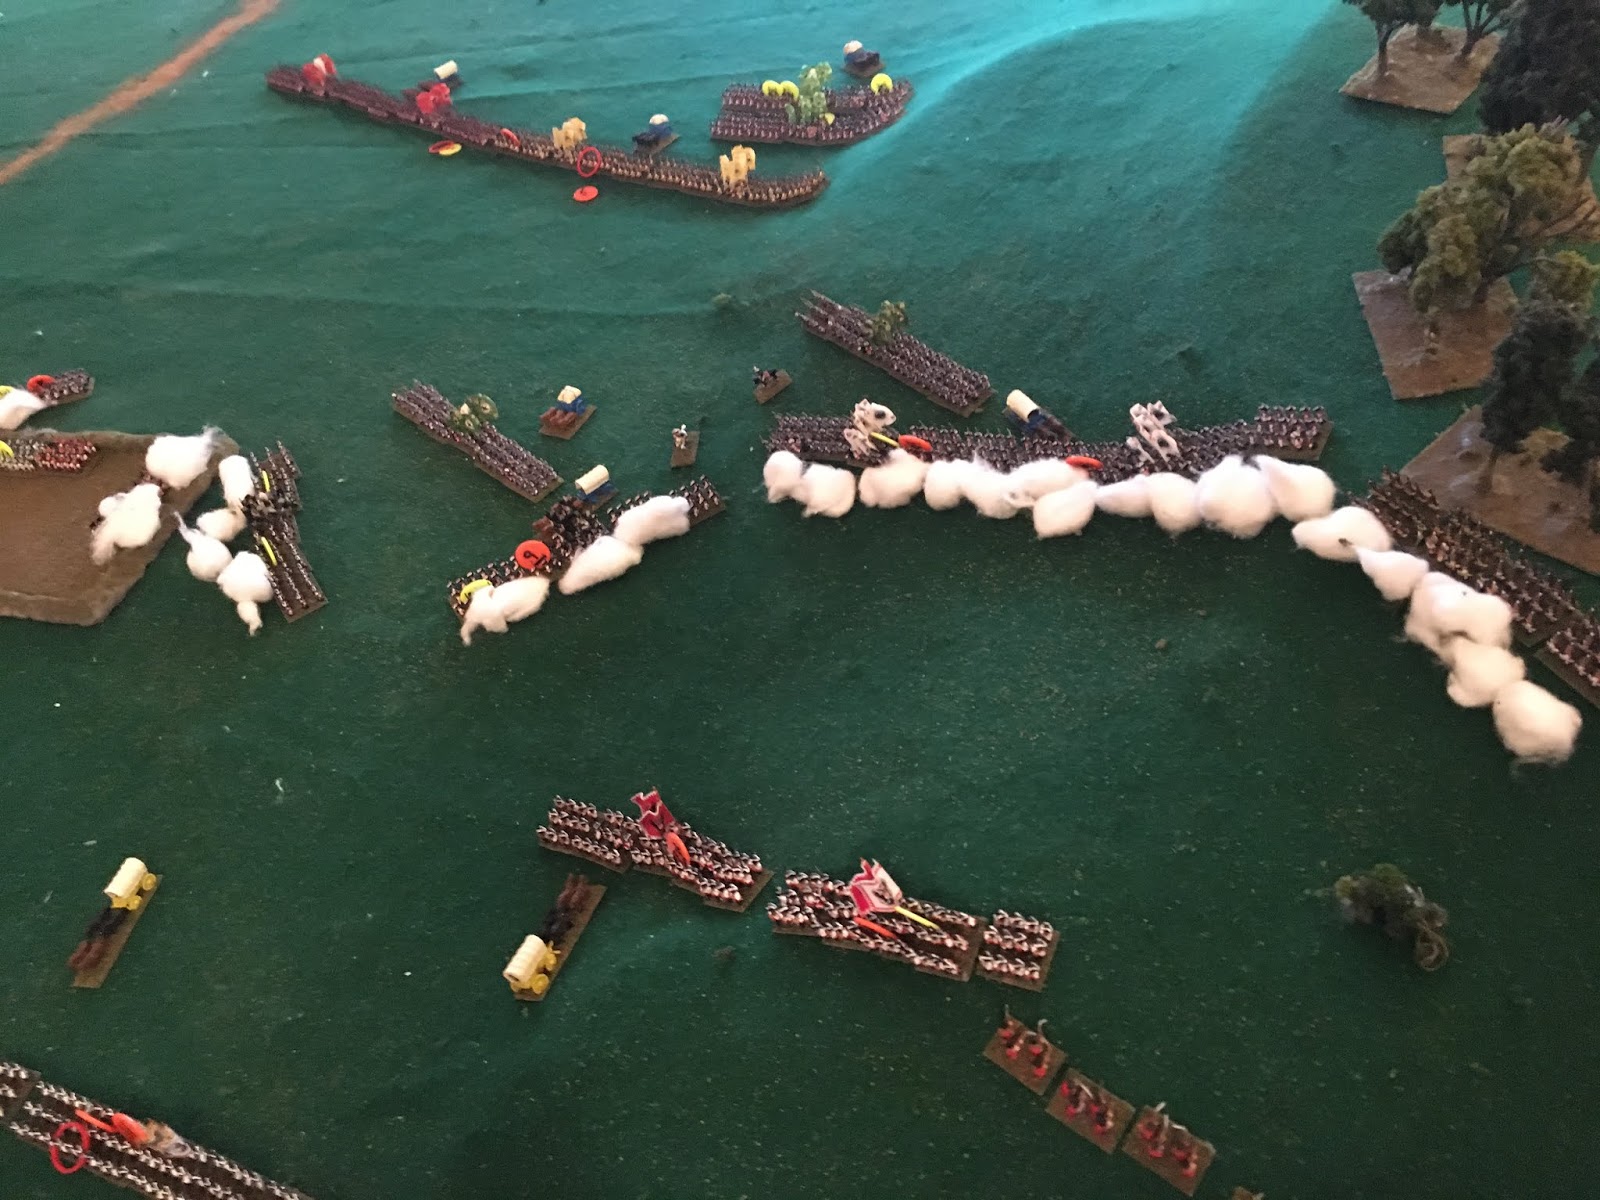
Next we have the Austrian guns blasting away at the advancing Prussian infantry. About 60% of Prussian infantry causalities were caused by Austrian artillery.
Also the "standing" Prussian cavalry begin to suffer at the hands of the Austrian artillery. These gun's effect on the outcome of the battle far outweighed their numbers.

On the far right the Prussian 3rd Hussars move up...in an attempt to counter the Grenz' skirmishing and perhaps to flank the Austrian redoubt.

In order to counter Prussian moves and to add "punch" to the Austrian cavalry, their 8th "Dessewffy"
Hussars move from right flank all the way to left...in support of possible charge!

Now the Austrian right flank has no cavalry support and must fight outnumbered, and with Prussians trying to "turn them"!

Prussian left flank spreads out to attack Austrians...and "YES" attempt to turn them!

The rest of the Prussians in this area also attempt to wheel and attack in "echelon"!
Prussians finally get their artillery "involved". But soon realize that the redoubts can't" be destroyed by guns alone

The Prussian cavalry continue to be shot up by Austrian artillery...finally the "Charge" is ordered!

The Prussian 3rd Hussars are 'suffering" at the hands of the Grenz with little means to respond!.

The Austrian cavalry move thru their infantry and prepare to charge!

Prussian infantry continue to take "heavy fire" at the hands of Austrian artillery!

The "Roth Wurzburg" infantry regt. moves up to cover flank. This action later becomes critical to success of Austrian arms!

Prussian infantry on the ridge and Grenz get into a firefight at close range. This is not how Grenz like to fight, but as they are now key in holding this flank...they have little choice.

More highlights of Prussian attempt to turn Austrians and their efforts to resist.

In the center the Prussian 26th inf. ( Meyerinck ) takes heavy casualties and starts to "waver"

FINALLY! The cavalry charge!

On the flank the Prussian, 3rd Hussars attempt to support the charge by attacking a redoubt and Grenz skirmishers.

The Austrian Dessewffy Hussars move up to support the charge and join the melee!

Here is an "Austrian view" of the battle in the center.

Meanwhile the battle on the Austrian far right is not going their way. The Grenz are no match for the crack Prussian Grenadiers!

In the center the Austrian Dragoons rout, but fortunately the Dessewffy Hussars take their place in the attack!

Close-up of battle on Austrian right flank. Unfortunately the Austrians are losing ground and probably this flank!

Prussian regt. the 28th (Hautcharmoy) gets into a firefight with Austrian 48th regt. (Luzzara "Luzan")

At the same time a little farther down the line the Prussian 12th (Hesse-Darmstadt) is in a firefight with the 52th (Bethlen)

At the same time the Prussian 26th Inf. has failed a morale test and retired!

In the big cavalry battle the Austrian (Savoyen) 4th Dragoon's morale has broken and it has routed! But luckily the Dessewffy Hussars replace it in the melee! Now the transfer of the Hussars seems to have been ..."wise". The Prussian 3rd Hussars now join the cavalry melee and also attack the redoubt and drive the Grenz away!

Next: An update on fighting on the rest of Austrian left flank....they are beginning to lose.

Another close-up on left flank...notice Dragoons are routing thru the town!

This is a view of Austrian center . They hold on...mainly because of "Grand Redoubt"!

The Austrian right flank continues to be pushed back, but the line is still in tact!

Main problem is that Grenz can't resist Prussian Grenadiers!

Another shot of pressure on this flank!

And an overview of Austrian right flank!

After 2 turns of melee with no winner, the cavalry melee has disintegrated... with both sides breaking off and retiring back...to reform and refresh the horses!

What a mess!. But the Prussians still have 2 cavalry regts in reserve but are unwilling to commit them. While the Austrian cavalry retire behind the Austrian battle line and attempt to regain order and refresh their horses. Unfortunately they will "spent" for the rest of the battle!

Although the Austrian left flank is weakened it does not fold!

Another view of Austrian left flank. The Prussians are no "great shape" either...with no infantry on this flank and a cavalry commander who will not order reserves to charge!

Austrian center continues to hold, while Prussian infantry continues to "bleed"!

One of the Austrian General of Brigade is killed and this causes the 48th (Luzan) to begin to waver. In this battle the Austrians lose all 4 of their Brigadiers....with serious consequences for morale and command control. Sometimes too close...is just that!

The Prussian left flank infantry continue to "wheel" in towards Austrians and join the fight!

Unfortunately at this time the right flank Austrian Grenz decide that now would be a good time to look for plunder... or at the least seek cover!

Luckily it was at this point that the Prussian Grenadiers stopped their advance and reformed! It has been a hard "climb" and a hot firefight with the Grenz!

Lets now take a look at the Austrian center and right flank. The line is still intact, but "strained"!

Another view of Austrian 48th and dead General!

Roth Wurzburg continues to hold on.... despite superior enemy forces.

And 52nd continues to hold in spite of losing it's Brigadier!

Another view of disordered Austrian cavalry...they will not recover today!

The battle is not going so good for some of the Prussian infantry regts. They are retiring as a result of "high" causalities! Austrians start retiring their guns and abandon the redoubts.

Prussian artillery finally get into position and inflict considerable damage on the Austrian infantry!

Prussian reserve cavalry still refuse to charge Words are passed between Bevern and their commander! I wonder what "old Fritz" and von Seydlitz will say about this!!

Austrian left flank starts retiring from the field!

Finally the pressure is too great on some Austrian units and the 17th Regt. (Kolowrat) routs! With another dead Brigadier!

but in spite of all this the brave Austrian Grenadiers continue to hold the "Grand Redoubt"! Empty of its guns they stay behind so that artillery can escape!

They are now gaps in the Austrian right flank and the troops start to retire!

Even the valiant Roth Wurzburg start retiring...in good order!

Right Flank Grenz leave the field!

Prussian infantry on this flank are "spent" and don't follow up! A hard "climb" and a hard "fight" has taken a toll!
Even the Grenadier battalions stop the advance!

The Austrian Grenadiers finally abandon the redoubt, but retire "facing the enemy"!

The Austrian cavalry have orders to cover a "General Retreat" of the Army!

And still the 52nd Regt. fights on...with General dead and lots of wounded!

Prussian 12th finally routs due to causalities and 52nd!

Half the Austrian army is in rout, but is saved by valiant Grenadiers, 52nd, Roth Wurzburg, and cavalry that have regained order. All the Austrian artillery escapes!
Close-up of Grenadiers!

The battle is over! The Prussians have won the field and forced the passage to the interior of Bohemia. The Austrians are retreating away from Koniggratz towards the south. And probably away from any encounter with the Prussian King! It was a "good win" for Bevern, but very expensive to the "rolls" of the infantry regts.
Butcher Bill:
Austrians: no guns lost. nor artillerymen
Cavalry: 62 lost - 25%
Infantry; 190 lost - 13%
Generals killed: 4 ; serious lost in leadership
Total Losses = 14%
Prussians: no guns lost. nor artillerymen
Cavalry: 60 lost - 12.5%
Infantry; 161 lost -11%
Generals killed: 0
Total Losses= 11.4%
Things to consider:
Set piece battles fought at almost even odds will probably be very bloody!
Attacking "prepared" enemy positions will almost always be very bloody!
Cavalry most often need open flanks to maneuver and attack.
Both cavalry and infantry attacks work best when they are made in support of each other!
On the defense build redoubts whenever you can.
On the offense "don't" attack redoubts "head-on"!
Maneuver until you have the advantage.. do not attack enemies that have time to prepare!
MOST OF ALL ENJOY THE GAME!