After his victory at the Battle of Pardubitz LG Bevern took action that we seldom see in our 7YW Campaigns......he decided to take a select group of his force and pursue the defeated Austrians!
Prussian Forces: The "pursuit" consisted of the following regts.:
5th (Reusch) and 6th (Werner) Hussars
1st (Normann) Dragoons
7th Infantry (Bevern)
21st Infantry (Hulsen)
and 3 12lb cannons (6 actual guns)
Total of 3,000 (300 figures) infantry, 3,200 (320 figures) cavalry Total of 6,200 men (620 figures) None of these troops had been engaged/nor had losses at the Battle of Pardubitz....so they were " relatively fresh"!
The reason that Bevern took such a risk with such a small force was that he had observed the Austrian army retreat from the Pardubitz battlefield in two different columns down different roads. Bevern had the opportunity before the battle of scouting the general area around Koniggratz and the roads to Kolin and Prague. Also, he had employed a "Protestant Czech merchant" that was willing to betray the Austrians for silver. With knowledge of the area and the betrayal in hand he realized that one of the Austrian's columns could be intercepted before the village of Srnojedy (on a separate intersecting road).
Bevern's possible reasoning for such a risk:
Perhaps, "A great pursuit" would "heal" or at least resolve any "agitation" that Frederick might have towards him ....due to the loss of Schwerin, Manteuffel and von Winterfeldt!
Bevern was also quite fortunate in that the Austrian column he was pursuing had suffered "shaken" morale in the Battle Pardubitz. And was not led by Daun. There "only goal" was to escape and "recover"....not fight again so soon!
Austrian Forces:
5 infantry regts, 10 bns. 7,500 men (750 figures)
3 cavalry regts. 1,920 men (192 figures)
8 12lb gun models (16 actual guns)
Total of 9,420 men (942 figures)
Also the Austrians were encumbered with lots of baggage, mule trains/pack animals, and camp followers.
So Bevern was outnumbered but had the element of "surprise" and much better "morale"!
Austrians retreating with pack animals interspersed with soldiers and baggage.

Additional pictures of Austrian "march".

And the Prussians finally appear on the" intersecting road" and "totally" surprise the Austrians!

The Austrians try to "respond"

Prussian Hussars attack!

Prussians start their attack! Notice their Dragoons move up!

the battle is joined for entire length of the Austrian line!

Prussian infantry and artillery never get into the fight...it is over too quickly!

Dragoons don't charge...just in case!

Austrian musketry is ineffective! Too many minuses on their fire...surprise, disorder, change of formation...etc.
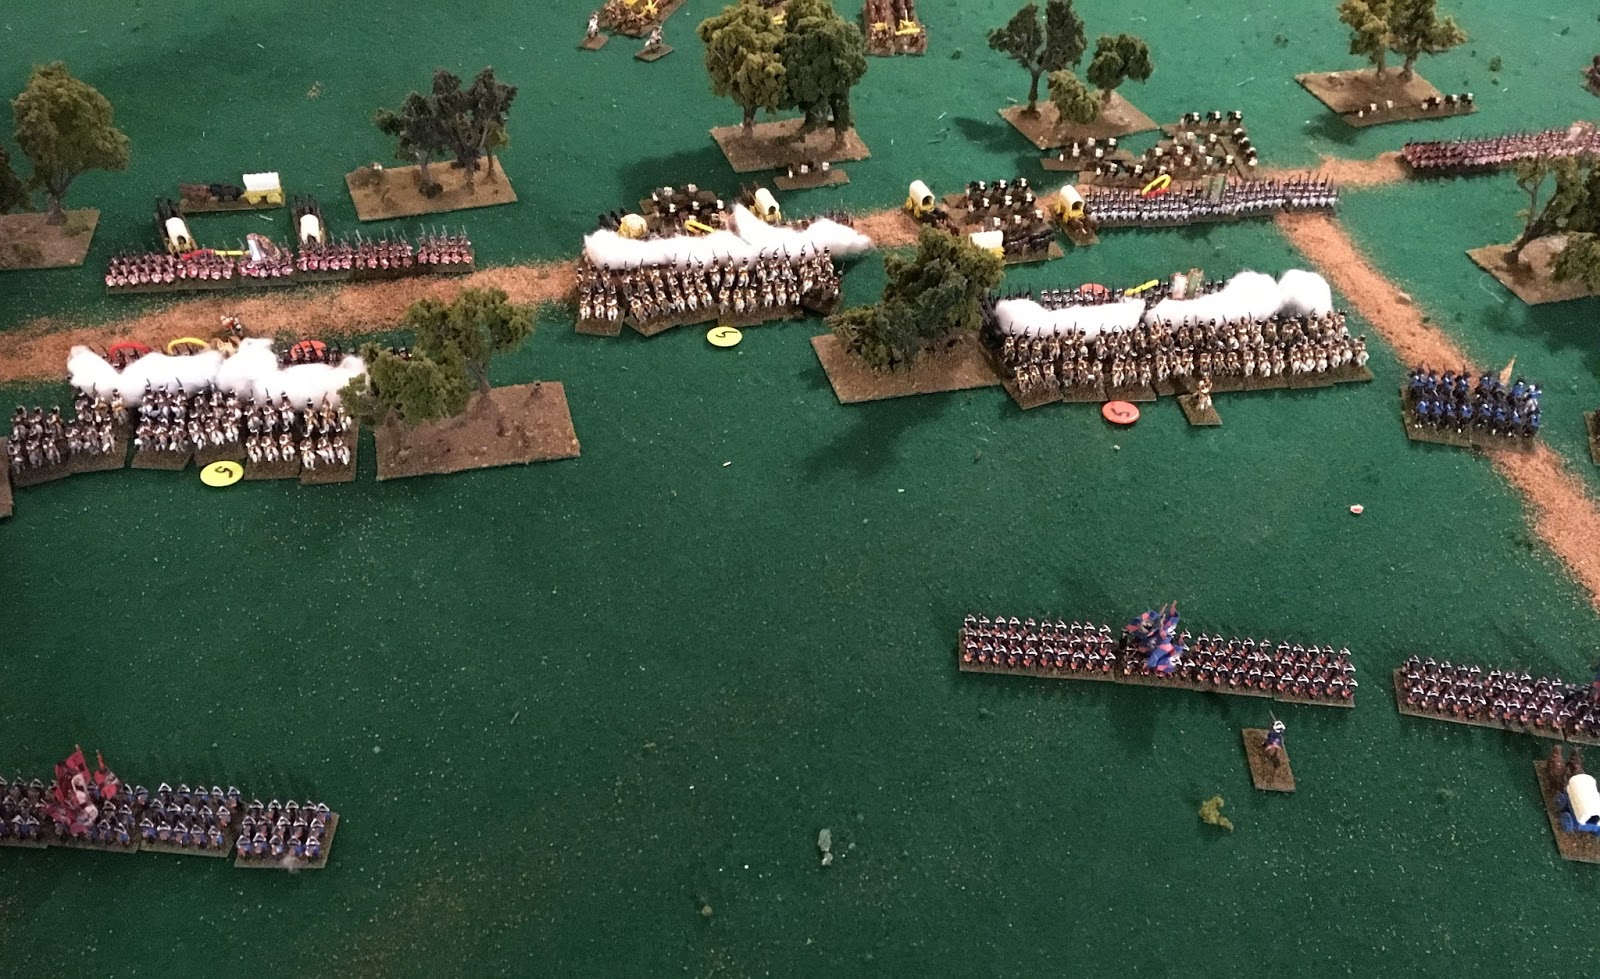
Austrians can't even move!

Biggest problem for the Austrians was that their cavalry routed when the Prussians surprised...and never stopped "routing".

The Austrians' line can not maneuver...nor escape!

Closeup of the carnage!

Austrian artillery all in rout!

The "routs" start to expand!

5th Hussars (death head) pursue Grenz

Almost all the Grenz were being butchered!

And Austrian cavalry continue to rout...their poor performance in this battle and at Pardubitz was one of the main reason for the Austrian failures!

No escape! 5 Austrian Generals were also taken prisoner!

Close-up of destruction! Yellow rubber bands denote rout, red are fatigue and disorder!

Austrians are finished!

Perfect example of "why" you must scout down adjacent or intersecting roads!
Riding a "little" in front of your column is not enough!

The "Butcher's Bill"
Austrians:
4,920 infantry men killed/captured (492 figures)
620 cavalry killed captured (62 figures)
8 gun models and crew captured!
58%
Prussians:
No infantry losses (didn't get engaged)
No gun losses
410 cavalry (41 figures) losses
A GREAT VICTORY FOR LG BEVERN!
HOW/CAN FREDERICK EXPLOIT IT???
No comments:
Post a Comment